Install Photoshop Shapes into Photoshop

Installing Photoshop Shapes in 5 Minutes
After reading this tutorial you will find out 2 quick ways of installing photoshop shapes sets into Photoshop. Let’s get started!
Way #1 – Install Shapes Using Preset Manager
- STEP 1. Open Photoshop. From the main menu, choose Edit/Preset Manager.
- STEP 2. In the opened Preset Manager dialog select Custom Shapes from Preset Type drop down menu:
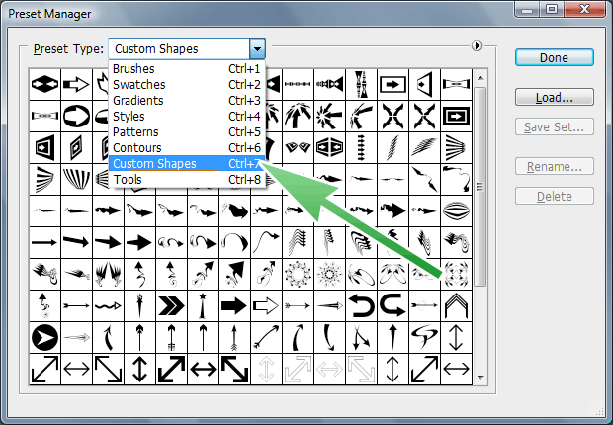
- After choosing Custom Shapes you will see shapes already loaded into your Photoshop. If you have never loaded any shapes, you will see the default ones Photoshop has provided for you.
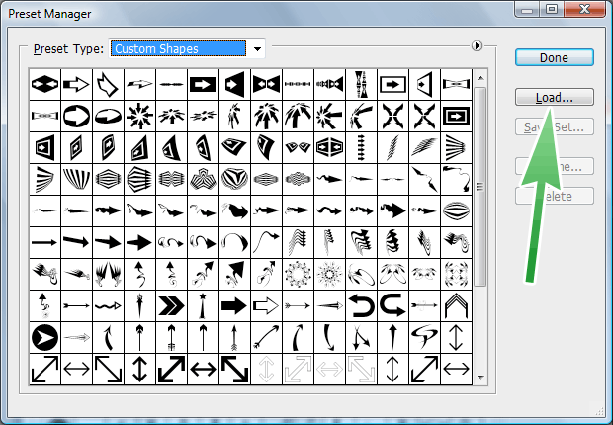
- STEP 3. Now, to load your shapes set into Photoshop, just press the button Load on the right of the Preset Manager dialog and select the .CSH file (Photoshop Custom Shapes) you would like to load:
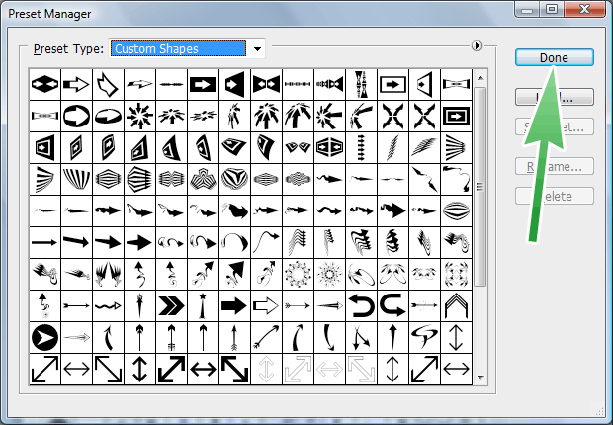
- STEP 4. Hurrah! You should be able to see the shapes you have selected to load. Just press Done button to finish:
- That’s it! You have successfully installed your photoshop shapes set into Photoshop and can start using them.
Way #2 – Install Shapes Using Custom Shape Tool
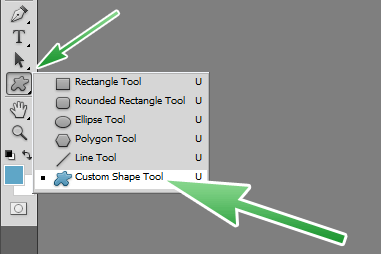
- STEP 1. Select the Custom Shape Tool (U key) from the Toolbar. You might not see it straight away on the Toolbar as other shape tools may have been selected earlier (Rectangle Tool, Ellipse Tool, or others). Just make the Custom Shape Tool selected.
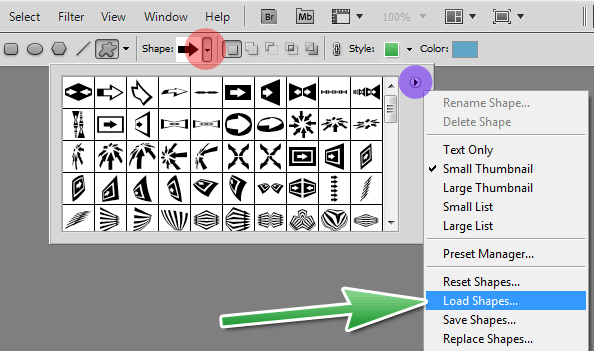
- STEP 2. From the Options Bar click the Preset Picker triangle icon (encircled red), then click the little triangle on the right of Preset Picker Panel (encircled violet), and then select the Load Shapes… option from the drop down list:
- STEP 3. From the Load Shapes dialog box select the photoshop custom shapes file (.CSH) on your hard drive.That’s it! You are done now and can start using the shapes you’ve got. If you need more photoshop shapes
- get them on the Photoshop Custom Shapes page.


0 comments:
Post a Comment